

Creating healthy and delicious treats and meals in the kitchen is one of my favorite things to do for my family, friends and me! I hope you enjoy some of my favorite recipes either I’ve used or created.
BREAKFAST
Almond Flour Strawberry & Blueberry Pancakes (Paleo, sugar-/grain-/gluten-/dairy-free & toddler friendly)
Created by Santa Monica Mama
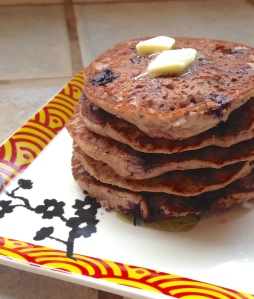
This recipe takes about 15 minutes and makes 10-15 small (2-3 inch) pancakes!
What You Need:
Ingredients (listed below)
blender (or whisk and a strong arm)
medium bowl
mixing spoon (for mixing blueberries into batter)
tablespoon (one you eat soup with) or ladle for pouring batter onto
griddle/pan
spatula
Ingredients:
1 C almond flour (homemade or Bob’s Red Mill Almond Meal/Flour)
1 C organic strawberries (fresh or frozen)
4 organic range-free eggs
1 dash of cinnamon
A few teaspoons of coconut milk (or any desired milk)
1 C organic blueberries (fresh or frozen)
Organic coconut oil (I use Trader Joe’s or Nutiva) or melted grass-fed butter (that’s what I used this time)
Directions:
1. Place the first 4 ingredients into your blender (or bowl if you’re using a hand whisk) and puree/whisk.
2. Pour batter into bowl and add a teaspoon, two or three of coconut milk if your batter is too thick and gently mix in your blueberries.
3. Heat greased griddle/pan over a medium-low flame (you’ll have to experiment to get the perfect heat since all stoves are different) and then once hot, pour tablespoons full of batter leaving about an inch of space in between.
4. Once the pancake batter bubbles, carefully and quickly slide your spatula under the pancake and flip, squishing your pancake flat to make sure the inside is cooked thoroughly.
5. Once browned on both sides, remove from griddle/pan and serve with butter, cream, fruit, honey, maple syrup or just as it is!
Blueberry Muffins (Paleo, sugar-/nut-/grain-/gluten/dairy-free & toddler friendly)
Adapted from Power Hungry

This recipe takes about 30 minutes for the muffins and makes about a dozen small 1 1/2″ cupcakes or approximately two dozen 1″ minis.
What You Need:
Ingredients (listed below)
muffin liners (greased with coconut oil spray) and tray OR silicone liners (greased with coconut oil)
muffin tin
small bowl
large bowl
measuring cups and spoons
whisk
spoon
Ingredients:
1 C organic coconut flour (if I don’t use homemade coconut flour, I use Bob’s Red Mill Organic Coconut Flour)
1 tsp baking powder
1/2 tsp fine sea salt
8 organic range-free large eggs (at room temperature)
1 C mashed organic ripe-banana
2/3 C (plus a few teaspoons for greasing muffin liners) melted organic coconut oil (I use Trader Joe’s or Nutiva) or melted grass-fed butter
4 Tbsp organic coconut milk (or you can substitute any type milk you desire)
4 tsp vanilla extract
1 1/2 C organic blueberries (fresh or frozen)
Directions:
1. Preheat oven to 350 degrees F. Grease muffin silicone cups or liners with coconut oil/butter and then place into a muffin tin.
2. Whisk dry ingredients together in a small bowl and starting with the eggs first, whisk wet ingredients together in a large bowl.
3. Pour the dry mixture into the wet and mix until will combined. Set aside for a few minutes allowing the batter to thicken as the coconut flour absorbs the liquid. Gently stir blueberries into batter.
4. Fill the muffin cups/liners with batter and portion them out evenly. Bake for 18-22 minutes or until a toothpick comes out clean. Remove from tin and place muffins onto a wire rack to cool. Enjoy! (you can store these in an air-tight container in the fridge for about a week and in the freezer for a few months)
Coconut Flour Banana Blueberry Pancakes (Paleo, sugar-/grain-/gluten-/nut-/dairy-free & toddler friendly)
Created by Santa Monica Mama

This recipe takes about 15 minutes and makes 15-20 small (2-3 inch) pancakes!
What You Need:
Ingredients (listed below)
blender (or whisk and a strong arm)
medium bowl
measuring cups & spoons
mixing spoon (for mixing blueberries and coconut milk into batter)
tablespoon (one you eat soup with) or ladle for pouring batter onto
griddle/pan
spatula
Ingredients:
2 medium to large sized organic ripe bananas (about one cup mashed – pre-mash if you are whisking by hand)
4 organic range-free eggs
1/2 C coconut flour (homemade or Bob’s Red Mill Organic Coconut Flour)
1/2 tsp of sea salt (I use pink Himalayan)
1 tsp baking soda
1/3 – 1/2 C coconut milk (or any desired milk)
1 C organic blueberries (fresh or frozen)
Organic coconut oil (I use Trader Joe’s or Nutiva) or melted grass-fed butter (that’s what I used this time)
Directions:
1. Place the first 4 ingredients into your blender (or bowl if you’re using a hand whisk) and puree/whisk.
2. Pour batter into bowl (if using a blender) and stir in baking soda and coconut milk (start with 1/3 C and then increase amount until the batter is thick but not overly thick). Let sit for about 3 minutes to allow the coconut milk to absorb the liquid (add more coconut milk if needed).
3. Gently stir in blueberries.
4. Heat greased griddle/pan over a medium-low flame (you’ll have to experiment to get the perfect heat since all stoves are different) and then once hot, pour tablespoons full of batter leaving about an inch of space in between.
5. The batter may not bubble so every 15 seconds or so, gently lift up the side of a pancake and once it looks browned, carefully and quickly slide your spatula under the pancake and flip, squishing your pancake flat to make sure the inside is cooked thoroughly.
5. Once browned on both sides, remove from griddle/pan and serve with butter, cream, fruit, honey, maple syrup or just as it is!
LUNCH/DINNER
Bacon Cauliflower Mac n’ Cheese (toddler friendly)
Adapted from Food Network’s Cauliflower “Mac” n’ Cheese Casserole

What You Need:
Ingredients (listed below)
Cutting board
Medium or large kitchen knife
Baking dish
Steamer
Sauce pan
Griddle or pan
Measuring cups/spoons
Paper towels or a few large dish towels
Ingredients:
1 large head of cauliflower (or 2 small heads)
Filtered Water
Coconut oil or grass-fed butter
12 oz block of grass-fed cheese
2 oz of cream cheese (whipped or block that is cut into small pieces)
1 C organic heavy whipping cream
1/4 tsp freshly cracked black peppercorn
1/8 tsp garlic powder
Pasture-raised bacon slices (number of slices based on how much you like bacon!)
Directions:
1. Fill your pot with some filtered water and put your steamer on the stove over medium heat.
2. Grease your baking dish with some coconut oil or grass-fed butter.
3. Wash cauliflower, peel leaves and cut off stem.
4. Chop lengthwise and then widthwise, making sure pieces are about the size of small macaroni pasta.
5. Steam your cauliflower for about 7 minutes or until crisp-tender and remove from heat to cool.
6. Pat and press dry with a paper towel or clean dish towel and then place into baking dish.
7. Preheat your oven to 375 degrees F.
8. Bring your heavy whipping cream to a simmer in a small saucepan and whisk in the cream cheese until nice and smooth.
9. Stir in half of your shredded cheese, freshly cracked pepper and garlic powder and whisk together until the cheese is melted.
10. Remove the cheesy sauce from heat (and try resist eating it by the spoonful!), pour it over the cauliflower, and stir to combine it in the baking dish
11. Top the cauliflower with the rest of your shredded cheese and bake it for about 15 minutes.
12. In the mean time, pan fry the bacon strips in your pan or griddle for a few minutes, flipping it over, until fully cooked.
13. Take the bacon, pat off the grease off with a paper towel and let it cool until crisp.
14. Chop and crumble the bacon into bits and then sprinkle over the mac n’ cheese.
Brussel Sprouts (toddler friendly)
Created by Santa Monica Mama

What You Need:
Ingredients (listed below)
Cutting board
Small kitchen knife
Bowl (size depending on the amount of brussel sprouts you are cooking)
Steamer
Pan (or something used for sautéing…I used the bottom pot from my steamer)
Pet bunny, compost bin or trash can (to discard unwanted brussel sprout pieces)
Ingredients:
Brussel Sprouts (of any amount)
Filtered Water
Organic Extra Virgin Olive Oil
Organic bacon fat or bacon cut into pieces (optional)
Seasoning (optional but I would recommend it!)
Directions:
1. Peel off the outer layer of leaves on each brussel sprout.
2. Wash the brussel sprouts under cold water.
3. Chop off the stems if needed.
4. Feed bunny the leaves and stems or discard them in your compost bin or trash can.
5. Steam brussel sprouts for 5-8 minutes and watch for the leaves to turn bright green. Check to see if a fork can easily poke through them.
6. Add some olive oil and bacon fat or bacon pieces (optional) to a pan and turn it on to a medium flame.
7. Sauté brussel sprouts until they begin to brown. If they aren’t soft enough (if making for baby or young child) pour 1-2 teaspoons of filtered water into the pan and cover with lid for 1-2 minutes until tender.
8. Take them out and cool before serving. Season with freshly cracked black peppercorn and a pinch of Himalayan Sea salt!
9. Enjoy them with any meal or as a meal itself 🙂
Octopus Hot Dogs & Zoodles (Zucchini Noodles) With Peas
Paleo, refined-sugar-, dairy-free, nut-free, soy-free, grain-free, gluten-free
Created by Santa Monica Mama

This recipe takes about 15 minutes and makes 1 adult-sized serving, 1-2 kid-sized servings or 2-3 toddler servings (all depending on their appetite).
What You Need:
Ingredients (listed below)
Cutting board & knife
Vegetable spiraler or Julienne Peeler
Small bowl
Small sauce pan & spoon
Toothpick
Serving dish/bowl
Ingredients:
1 hotdog link (I use Applegate’s organic nitrate-free 100% beef dogs)
3-4 Tbsp filtered water
1 medium-sized zucchini squash
1 Tbsp grass-fed butter or coconut oil
1/4 C frozen peas
Directions (Hot Dogs):
1. Using your knife, slice the hotdog link in half so that you have two half sized links.
2. Leaving 3/4″ at the end of each link (where the casing ends are), slice the rest of the link in half, making two long tentacles.
3. Slice the two tentacles in half again making four tentacles on each octopus.
4. Slice each tentacle in half so that each octopus has 8 long tentacles (if your little one doesn’t eat a full-sized hot dog, you can save the other octopus for later or make smaller sized ones like I did).
5. Pour 3-4 tablespoons of filtered water into your sauce pan so that it covers the bottom and put it over a medium-low flame. Once the water starts to bubble, place your octopus hotdogs in and rotate until they are tender.
6. Once ready, remove and let cool. Using your toothpick, poke holes to make little eyes and using your knife, carefully carve out smiles!
Directions (Zoodles WIth Peas):
1. Rinse and dry your zucchini, cut off its ends and use your “pasta” tool to create Zoodles (if you’re using the vegetable spiral, get your little one involved by turning the handle and placing the Zoodles into your small bowl).
2. Cut Zoodles into an appropriate length for your child (1 1/2″ is just right for K).
3. Rinse your saucepan clean, put your butter or oil in the pan and place over a medium-low flame.
4. Saute your Zoodles until they are al dente and then remove and let cool.
5. Put peas in the sauce pan, stir them around until tender and then remove from heat.
6. Once cool, lay the Zoodles onto a dish, sprinkle some peas on top and joyfully pop in your happy octopi for your little one (or yourself) to enjoy!
Peas (this recipe is for exclusively for babies & toddlers)
Created by Santa Monica Mama

What You Need:
Ingredients (listed below)
Air tight container or serving bowl
Steamer (if serving warm/hot)
Filtered water (for steamer)
Blender (if you are pureeing for baby)
Ice cube tray (if you are storing for baby)
Ingredients:
Green/garden peas
Breast milk (optional if pureeing for baby)
Directions:
Frozen Peas:
1. If you’re on the go, pour 1/2 – 1 cup of frozen peas into your airtight container and take it to go for your little one! If serving immediately, leave peas out for a few minutes to partially defrost before serving.
Peas Served Warm:
1. Fill your steamer with filtered water and put it on the oven until boiling. Add your desired amount of peas into the steamer and let steam for 3-5 minutes.
2. Take peas out of the steamer and let cool before serving.
Pureeing/Storing Peas:
1. Fill your steamer with filtered water and put it on the oven until boiling. Add your desired amount of peas into the steamer and let steam for 3-5 minutes.
2. Take peas out of the steamer and puree in your blender. Add some breast milk or a teaspoon or two of the filtered water from your steamer if needed. Let cool for a few minutes.
3. Serve immediately and/or store in ice cube trays. Be sure to place into the freezer almost immediately.
4. When serving, pop a peas cube out and reheat in a pan over the stove or in a water bath in a glass container. (Do not save leftovers or refreeze for a second time)
SNACKS/DESSERTS
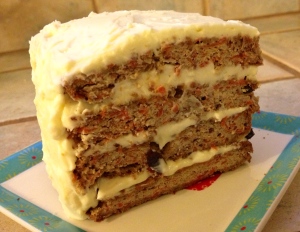
Almond Flour Carrot Cake/Muffins (Paleo, sugar-/grain-/gluten-/dairy-free and toddler friendly)
Adapted from Elana’s Pantry

This recipe takes about 90 minutes and makes 30-36 small muffins, 18-24 medium sized muffins, a 9″ round layered cake or a combination of smaller versions.
What You Need:
ingredients (listed below)
large bowl
medium bowl
whisk
mixing spoon
measuring cups/spoons
vegetable peeler, knife, cutting board & food processor (with shred disc) if carrots are not pre-shredded
tablespoon (one you eat soup with) for pouring batter into muffin cups
muffin liners (pre-greased) & muffin tins (if liners are not silicone) OR 9″ round pans
Ingredients:
3 C blanched almond flour (homemade or Bob’s Red Mill Almond Meal/Flour)
1 tsp pink Himalayan sea salt
1 tsp baking soda
1 tsp nutmeg
1 Tbsp cinnamon
5 organic range-free eggs (at room temp)
1/2 C mashed ripe organic banana (1 large banana)
1/4 C melted/softened organic coconut oil (I use Trader Joe’s or Nutiva) or melted grass-fed butter
3 C organic carrots (shredded or about 8 large carrots)
1 C organic raisins (optional – if not soft, soften by soaking in hot water for a few minutes)
1 C organic chopped walnuts (optional)
Directions:
1. Place the first 5 dry ingredients into your large bowl and whisk together.
2. Whisk your eggs in your medium-sized bowl and then whisk in the melted/softened coconut oil and mashed banana.
3. If your carrots are not shredded, peel your whole carrots, chop off the ends (save in the freezer for when you make bone stock) and then shred them in your food processor. Place 3 cups of shredded carrots into your wet ingredients along with your raisins and walnuts.
4. Pour your wet ingredients into your large bowl and stir until well combined.
5. Scoop batter into your greased muffin liners filling them 3/4 full if making muffins OR fill a greased 9″ round pan with 1/4 of the batter.
6. Bake for 25-35 minutes or until a toothpick comes out clean at 350 degrees F.
7. Once ready, let cool on and then frost with Honey Butter Cream Cheese Frosting (see below). If making a cake, carefully remove each layer and then alternate cake/frosting/cake/frosting/etc. and then frost the sides.
Honey Cream Cheese Frosting
(for a dairy-free version, check out Elana’s Pantry’s Coconut Cream Frosting)
This recipe takes a few minutes and the frosting can be made while your muffins/cake are in the oven. If you are making the carrot cake and want thick, even layers, double this recipe and frost generously!
What You Need:
ingredients (listed below)
medium bowl
electric hand mixer (with mixer or whisk) or a metal whisk and a strong arm
rubber spatula
knife for frosting
Ingredients:
1 8oz container of regular organic cream cheese (softened/at room temperature)
1 stick of organic grass-fed butter (softened/at room temperature)
2 heaping tsp raw organic honey (you can add more to taste)
2 tsp organic vanilla (optional)
Directions:
1. Place cream cheese and butter into bowl and mix on a medium low setting until fluffy.
2. Once combined, turn off mixer and add honey and vanilla to your frosting.
3. Mix on a medium low setting for another 10-15 seconds.
4. Generously frost cooled muffins or cake. Store in an air tight container in the fridge and let defrost for 15 minutes before frosting/serving. Enjoy!
Chocolate Pudding (coconut milk-based)
Paleo, refined-sugar-, dairy-free, nut-free, soy-free, grain-free, gluten-free
Created by Santa Monica Mama
This recipe takes about 3 minutes and makes 2 servings (or 3 for a toddler)
What You Need:
Ingredients (listed below)
blender with spatula
serving bowl & spoon
knife & cutting board (optional for fruit toppings)
glass (freezer) containers (optional for storage)
Ingredients:
1 peeled organic banana (the greener the healthier)
1 pitted organic ripe avocado
2 Tbsp unsweetened cocoa powder
1/4 C coconut milk
fruit or coconut flakes for a topping
Directions:
1. Place all ingredients (except toppings) into the blender and puree.
2. Use spatula to remove putting and place into bowl/storage containers.
3. Slice/chop fruit and then sprinkle over pudding.
4. Enjoy immediately or place into the freezer for about 15 minutes for a frozen treat!
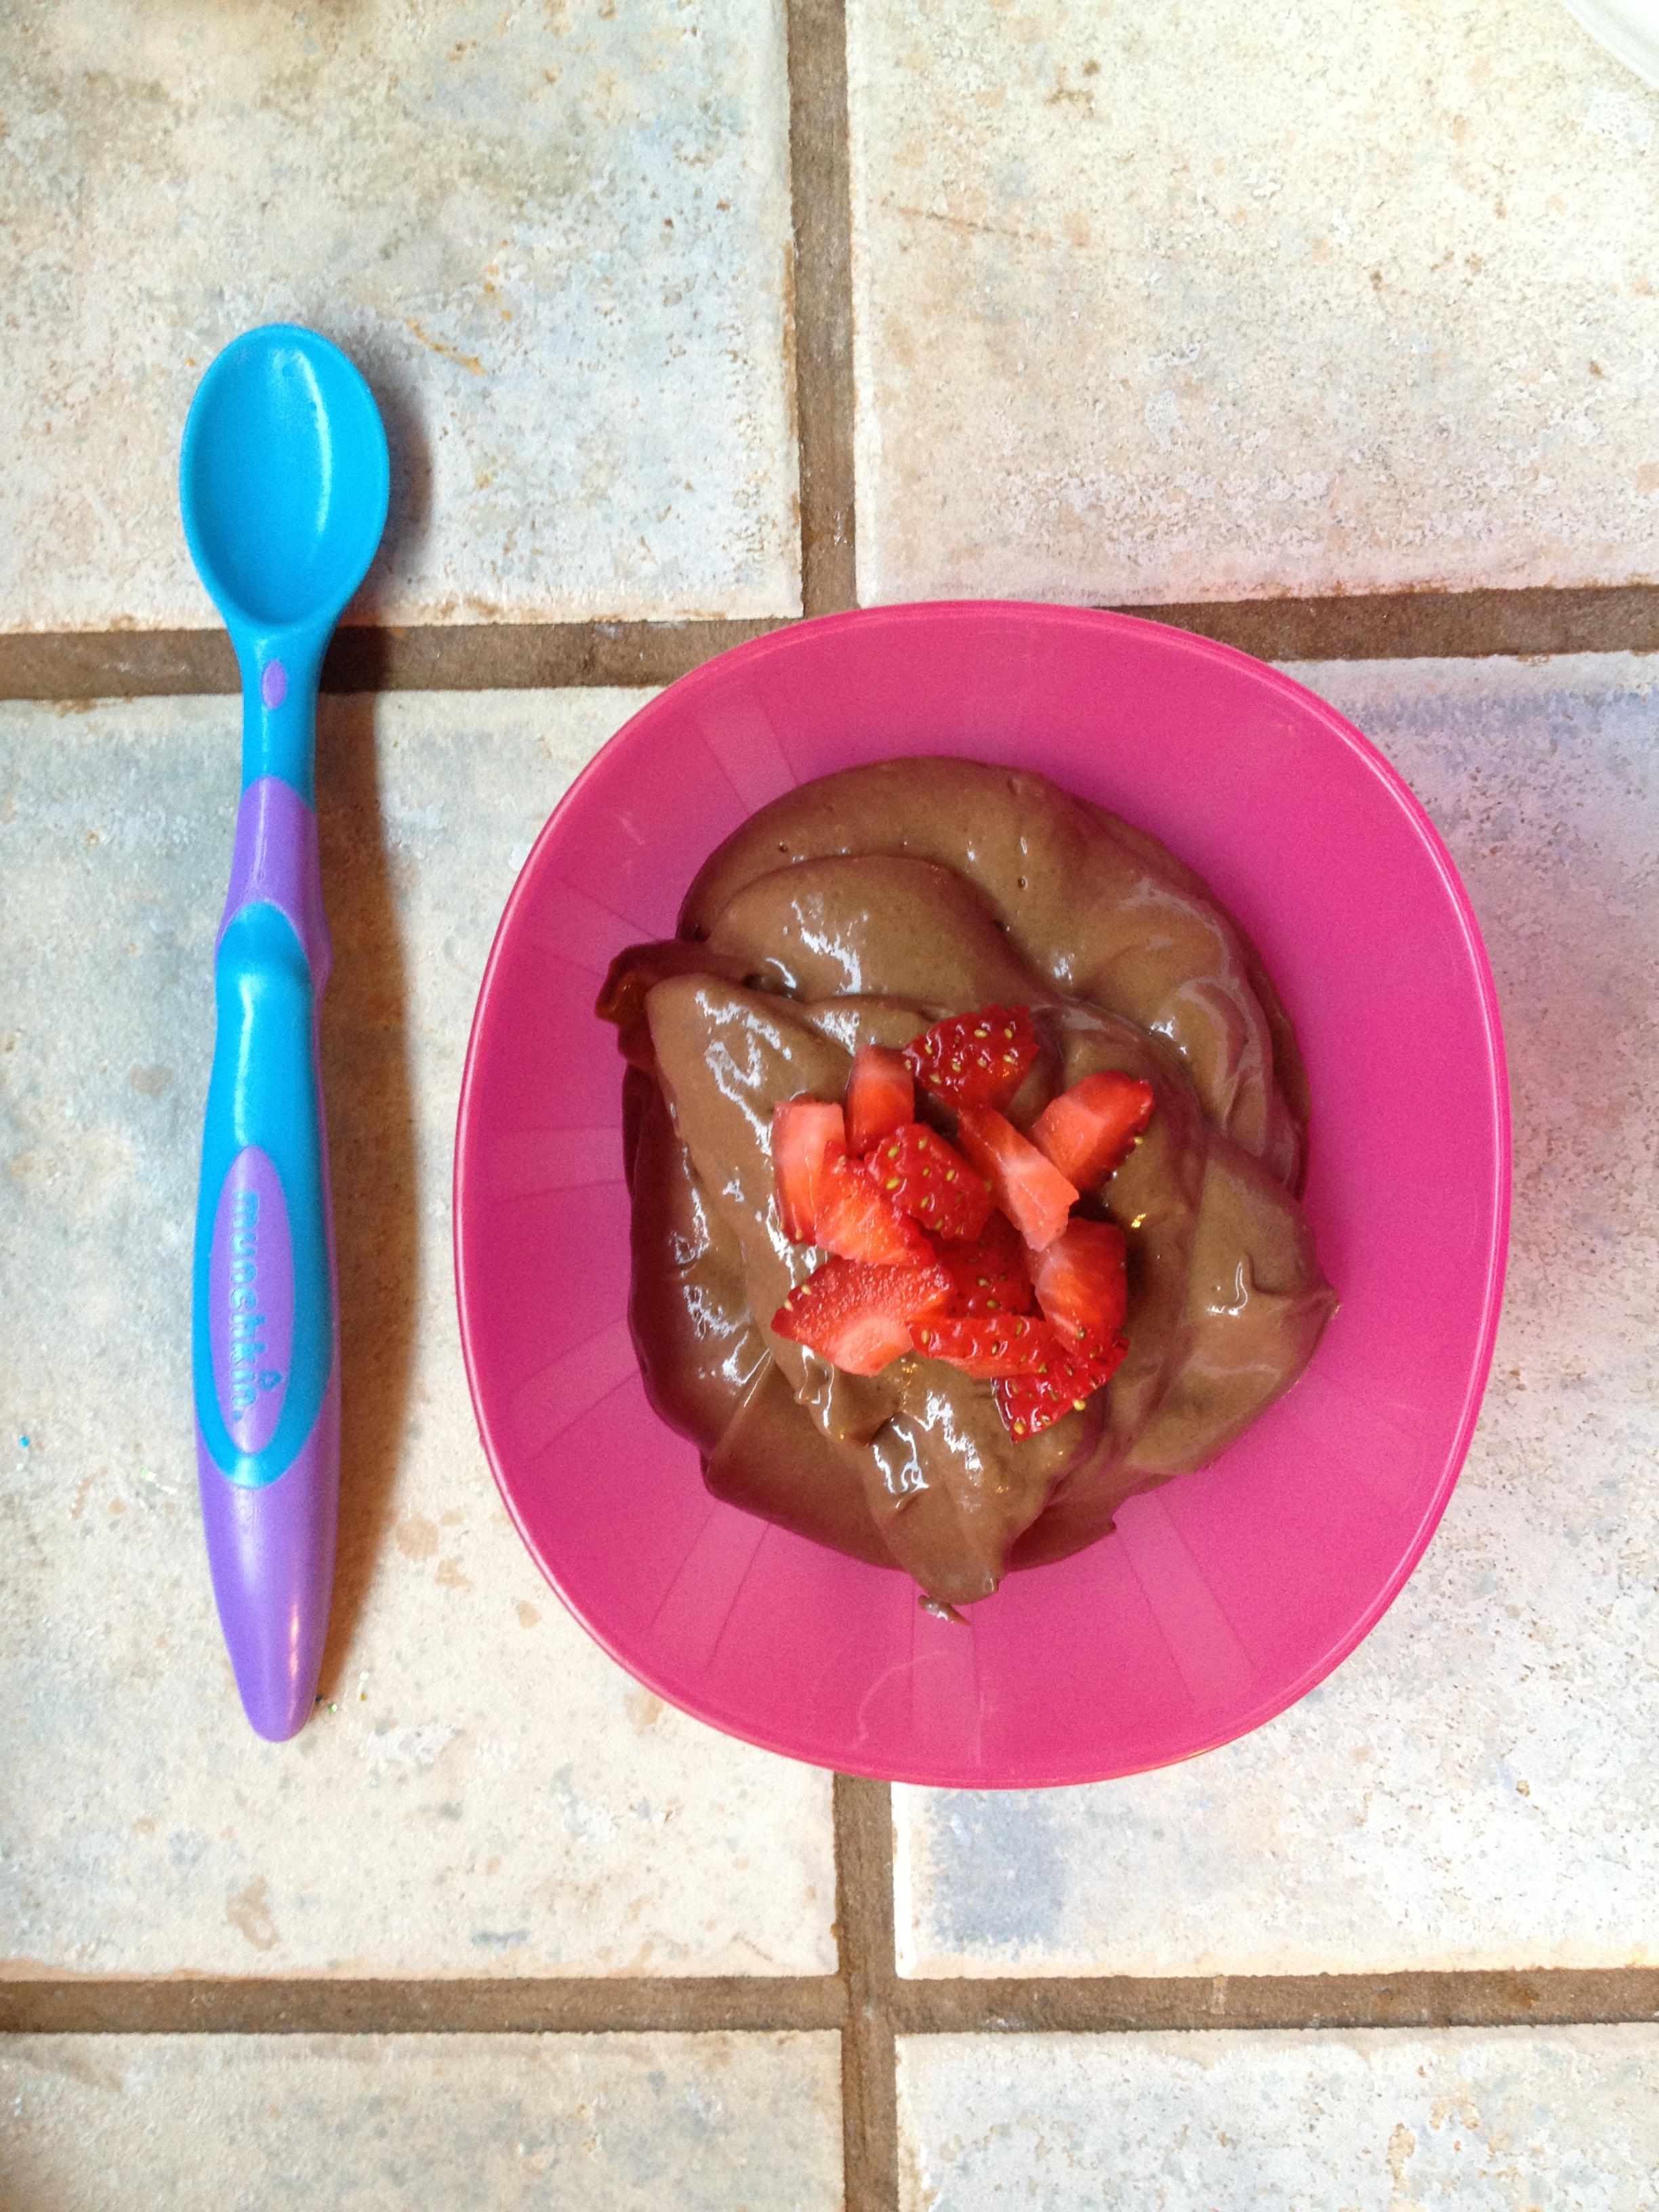
Chocolate Pudding (strawberry-based)
Paleo, refined-sugar-, dairy-free, nut-free, soy-free, grain-free, gluten-free
Created by Santa Monica Mama

This recipe takes about 3 minutes and makes 2 servings (or 3 for a toddler)
What You Need:
Ingredients (listed below)
blender with spatula
serving bowl & spoon
knife & cutting board (optional for fruit toppings)
glass (freezer) containers (optional for storage)
Ingredients:
1 peeled organic banana (the greener the healthier)
1 pitted organic ripe avocado
2 Tbsp unsweetened cocoa powder
1/2 C organic strawberries (I use frozen ones)
fruit or coconut flakes for a topping
Directions:
1. Place all ingredients (except toppings) into the blender and puree.
2. Use spatula to remove putting and place into bowl/storage containers.
3. Slice/chop fruit and then sprinkle over pudding.
4. Enjoy immediately or place into the freezer for about 15 minutes for a frozen treat!
Coconut Avocado Pear Popsicles
Paleo, grain-free, gluten-free, dairy-free, nut-free, soy-free, baby/toddler-friendly
Adapted from The Spunky Coconut’s Avocado Pear Baby Food Pops

This recipe takes about 45 minutes or however long your freezer takes to freeze popsicles (10 min. prep & 35 min. + in the freezer) and makes 4 popsicles
What You Need:
Ingredients (listed below)
blender or food processor
popsicle molds (I used these Mickey Mouse ones) OR small Dixie cups, aluminum foil & popsicle sticks
thin spatula or teaspoon (for filling molds/cups)
small bowl
Ingredients:
2 ripe pears with skins removed (I used organic d’ anjou pears)
2 ripe avocados pitted and scooped
1/2 C finely shredded coconut flakes (I use Let’s Do Organic Coconut)
Directions:
1. Puree pear and avocado in blender/food processor.
2. Fill popsicle molds with puree (try to fill all the air pockets) .
3. If using cups, fill with puree 3/4 full and cover the with foil. Push popsicle sticks through the center of the foil, making sure the stick is 2/3 of the way down (make sure it does not touch the bottom).
4. Place into freezer. While waiting, pour coconut flakes into small bowl and set aside.
5. Once frozen, defrost for a few minutes and then remove popsicles (I ran some warm water over the molds for a minute before removing).
6. Dip popsicles into coconut flakes, using your fingers to coat them. If coconut flakes are not sticking, quickly run cold water over your pop and try again!
7. Serve immediately and enjoy on a hot day!
Coconut Sprinkled Chocolate Dipped Frozen Banana (Grain-/gluten-/dairy-/nut-/soy-free) Baby/toddler version included!
Created by Lisa (Santa Monica Mama)
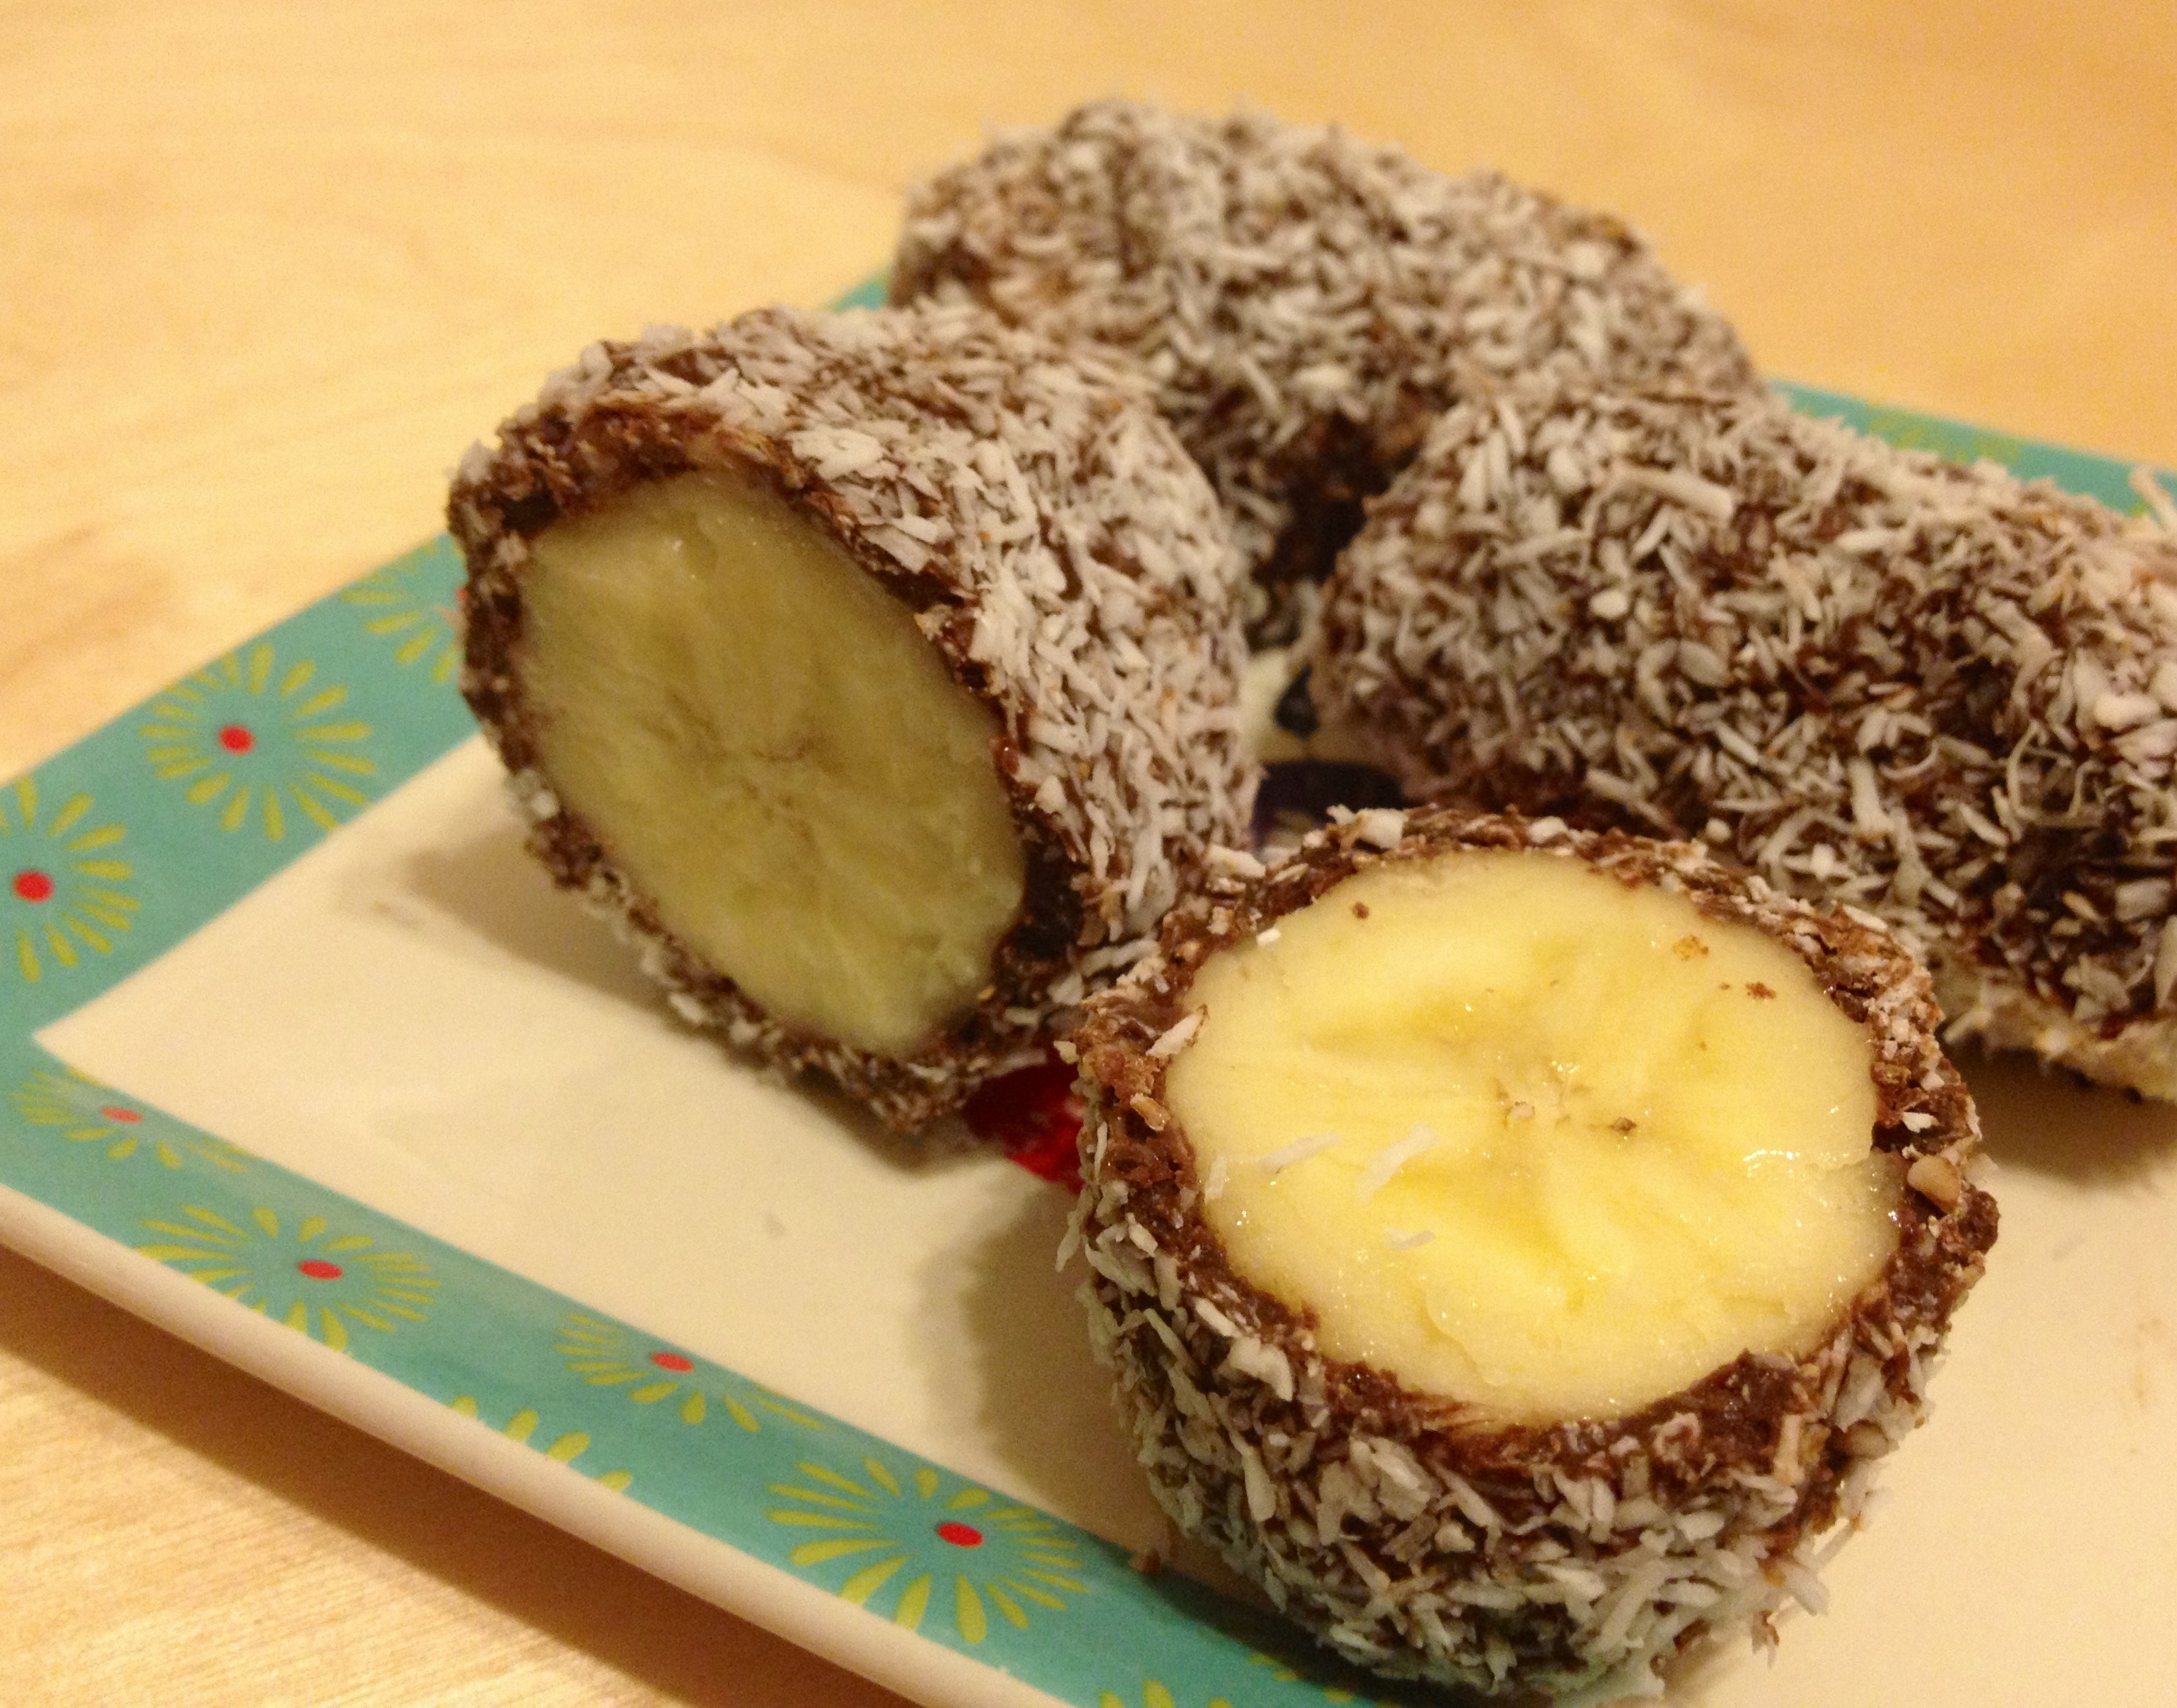
This recipe takes about 30 minutes (10 min. prep & 20 min. in the freezer) and makes 3 full-size bananas, ~ 30 slices or 6 chunks
What You Need:
Ingredients (listed below)
small bowl (plastic is fine)
small ceramic or glass bowl
larger bowl/pan that the small bowl can fit in (for a water bath)
measuring cups & spoons
teaspoon (one you eat soup with)
medium-sized tray/pan lined with aluminum foil
Ingredients:
1-2 C boiling water (for water bath)
1 C Enjoy Life dairy-/soy-/nut-/gluten-free semi-sweet chocolate chips
2-3 tsp melted or solidified coconut oil (I use Trader Joe’s or Nutiva)
1 C finely shredded coconut flakes (I use Let’s Do Organic Coconut)
3 medium to large sized bananas sliced, cut up into thirds or left as whole
Directions:
1. Pour coconut flakes into the small plastic bowl and set aside.
2. Pour chocolate chips and coconut oil into your small ceramic/glass bowl and place bowl inside your larger bowl.
3. Carefully pour boiling water into your larger bowl, creating a water bath to melt the chocolate.
4. Begin to gently stir mixture together and take the bowl out once only a few chips are left unmelted.
5. Drop banana pieces one at a time into the chocolate mixture, coat and then remove with spoon (if using the full-sized banana, spread the chocolate mixture onto the banana until well coated).
6. Either place chocolate dipped banana pieces right into the coconut, swirl around in the bowl until completely covered in coconut OR place dipped bananas onto your foil and sprinkle your desired amount of coconut on top.
7. Put your tray into your freezer for about 20 minutes and then serve (if you leave it in longer or you have a very cold freezer, you may want to leave out for a few minutes to defrost before eating…and that’s only if you can wait).
Dark Chocolate Truffles
Adapted from Nom Nom Paleo’s award-winning Nom Nom Chocolate Truffles

What You Need:
Ingredients (listed below)
Knife and cutting board OR vegetable peeler OR hand grater (I’ve tried using all 3 and tend to find the peeler the most efficient)
Medium sized-bowl
Small saucepan
Plastic spatula
Medium sized glass container with air-tight lid
Teaspoon (one you would use to eat soup) or 1″ in diameter melon-ball scooper
Small bowls (amount depending on how many ingredients you will roll truffles in)
Serving tray or air-tight container (for storage)
Ingredients:
10 oz dark chocolate (72% cacao content or higher ~ if using the Trader Joe’s baking bar, it comes out to 22 small squares)
3 Tbsp coconut oil
1 C full-fat coconut milk (canned or homemade)
1 tsp pure vanilla extract
Optional: A few tablespoons of unsweetened cocoa powder, toasted coconut, bacon bits, chopped nuts or really anything to roll truffles in! And/or a few tablespoons of nut butter or whole nuts to place in the center of your truffles.
Directions:
1. Chop or grate dark chocolate into small shards (using either your knife, vegetable peeler or grater) and set aside in a bowl with the coconut oil (if you are using the peeler or hand grater, hold onto the chocolate bar wrapped in a paper towel or cloth to keep it from melting).
2. Heat the coconut milk over medium heat in your saucepan until it begins to simmer.
3. Pour the coconut milk onto the chocolate and coconut oil mixture.
4. With your spatula, stir VERY gently so that it doesn’t become grainy.
5. Add your vanilla and continue to stir.
6. Place the mixture into your glass container, seal it tightly and place it in the fridge for 4 hours (I’ve heard that you can speed up the process by placing it in the freezer for 2 hours but have yet to try this).
7. Meanwhile, prepare your other ingredients that you’ll be rolling your truffles in or putting into the center of your truffles:
Cocoa Powder: Pour a few tablespoons of cocoa powder into a small bowl.
Toasted Coconut Flakes: Spread coconut flakes onto a piece of parchment paper on a tray and bake for 3-5 minutes at 300 degrees F. Once golden, remove flakes from the oven, let cool and pour into a small bowl.
Bacon Bits: Pan fry a few pieces of bacon on a pan or griddle over medium heat for a few minutes. Once fully cooked, pat off grease. Once cooled, chop up bacon into small bits and place into a small bowl.
Nuts: If rolling into the truffles, chop nuts (with a hand chopper) into small pieces. If placing them into the center of the truffles, chop them in half or leave them whole.
Nut Butter: For each truffle, scoop out a small ball (1 cm diameter) of refrigerated nut butter and place them on a cutting board or parchment paper-lined tray and place in the freezer.
8. Once your truffle mixture is ready, take your teaspoon or melon ball scooper and scoop out a ball, mold with your hands (make sure your hands are cool ~ if they aren’t, try rinsing your hands under cold water beforehand) and dip the truffle into one of your bowls, covering it with its topping. If you are filling it with nut butter or another ingredient, mold the truffle mixture around it and roll into a ball (roll it into one of your other ingredients for a more complex flavor and texture if you’d like!)
9. Place your ready-to-devour truffle on a serving tray, into your storage container (if you will be refrigerating or freezing them to save for later), or right into your mouth!!! As Nom Nom Paleo shared, if you are freezing your truffles, wait to roll them into your toppings right before serving. Take them out of the freezer and bring room temperature for about 30 minutes, roll truffles into your hands, cover them with toppings and serve.
Macadamia Nut Chocolate Chip Lara Bars
Created by Lisa (Santa Monica Mama)

What You Need:
Ingredients (listed below)
Food processor or blender
Small bowl
Medium to large size bowl
Rolling pin (if desired…I’ve always used my hands instead)
Butter knife (or any knife, pizza roller or tool to slice)
Parchment paper, a gallon sized Ziplock plastic bag OR a plastic wrap (to roll and form bars on)
Airtight storage containers OR snack-sized Ziplock plastic bags (to store bars)
Ingredients:
2/3 C Macadamia Nuts
1/2 C Finely Shredded Coconut (I use Let’s Do Organic)
1/2 C Dates (pitted or paste)
1/4 tsp Fine Sea Salt or Pink Himalayan Salt
6 Tbsp Chocolate Chips (I use dark chocolate Enjoy Life
or SunSpire Organic chips)
Raspberry Macadamia Nut Yogurt (baby & toddler friendly)
Created by Santa Monica Mama

What You Need
Ingredients
Small Bowl
Teaspoon
Ingredients
1/2 C Organic Full-Fat Yogurt (cow or goat’s milk, whatever baby prefers)
1 tsp Macadamia Nut Butter (a few cups of macadamia nuts blended with a tsp or two of coconut oil)
Fresh Organic Raspberry
Directions
1. Fill your bowl with yogurt
2. Drop a teaspoonful of macadamia nut butter in the center
3. Top with an organic raspberry
4. Serve to your little one or enjoy it yourself as a snack or dessert!
Directions:
1. Chop macadamia nuts in a food processor or blender (pulse until fairly small but not into flour or nut butter) and set aside in a small bowl.
2. If using fresh dates, blend them in a food processor or blender until like a paste (add a tsp or two of water if needed).
3. Place paste in the medium or large bowl along with the salt, shredded coconut and mix together with your hands for a few minutes.
4. Add in your chopped macadamia nuts and mix for another minute or so.
5. Then add your chocolate chips and mix with your hands so that they are evenly distributed throughout the dough (you may want to rinse your hands in cold water before mixing the chips to prevent them from melting).
6. Form the dough into a ball and roll out (with a rolling pin or press with the palm of your hands) so that it is about 1/2 an inch thick.
7. Using your knife, cut into bars and form them using your hands to make them into your ideal sized snack. OR…roll them into little balls if you’d rather pop them into your mouth throughout the day!
8. Place in your storage container of choice and put them in the fridge to set for 20 minutes or as long as you can wait 🙂
9. Enjoy them as a mid-morning snack or dessert at the end of your day!
Shamrock Shake (toddler friendly)
Created by Santa Monica Mama
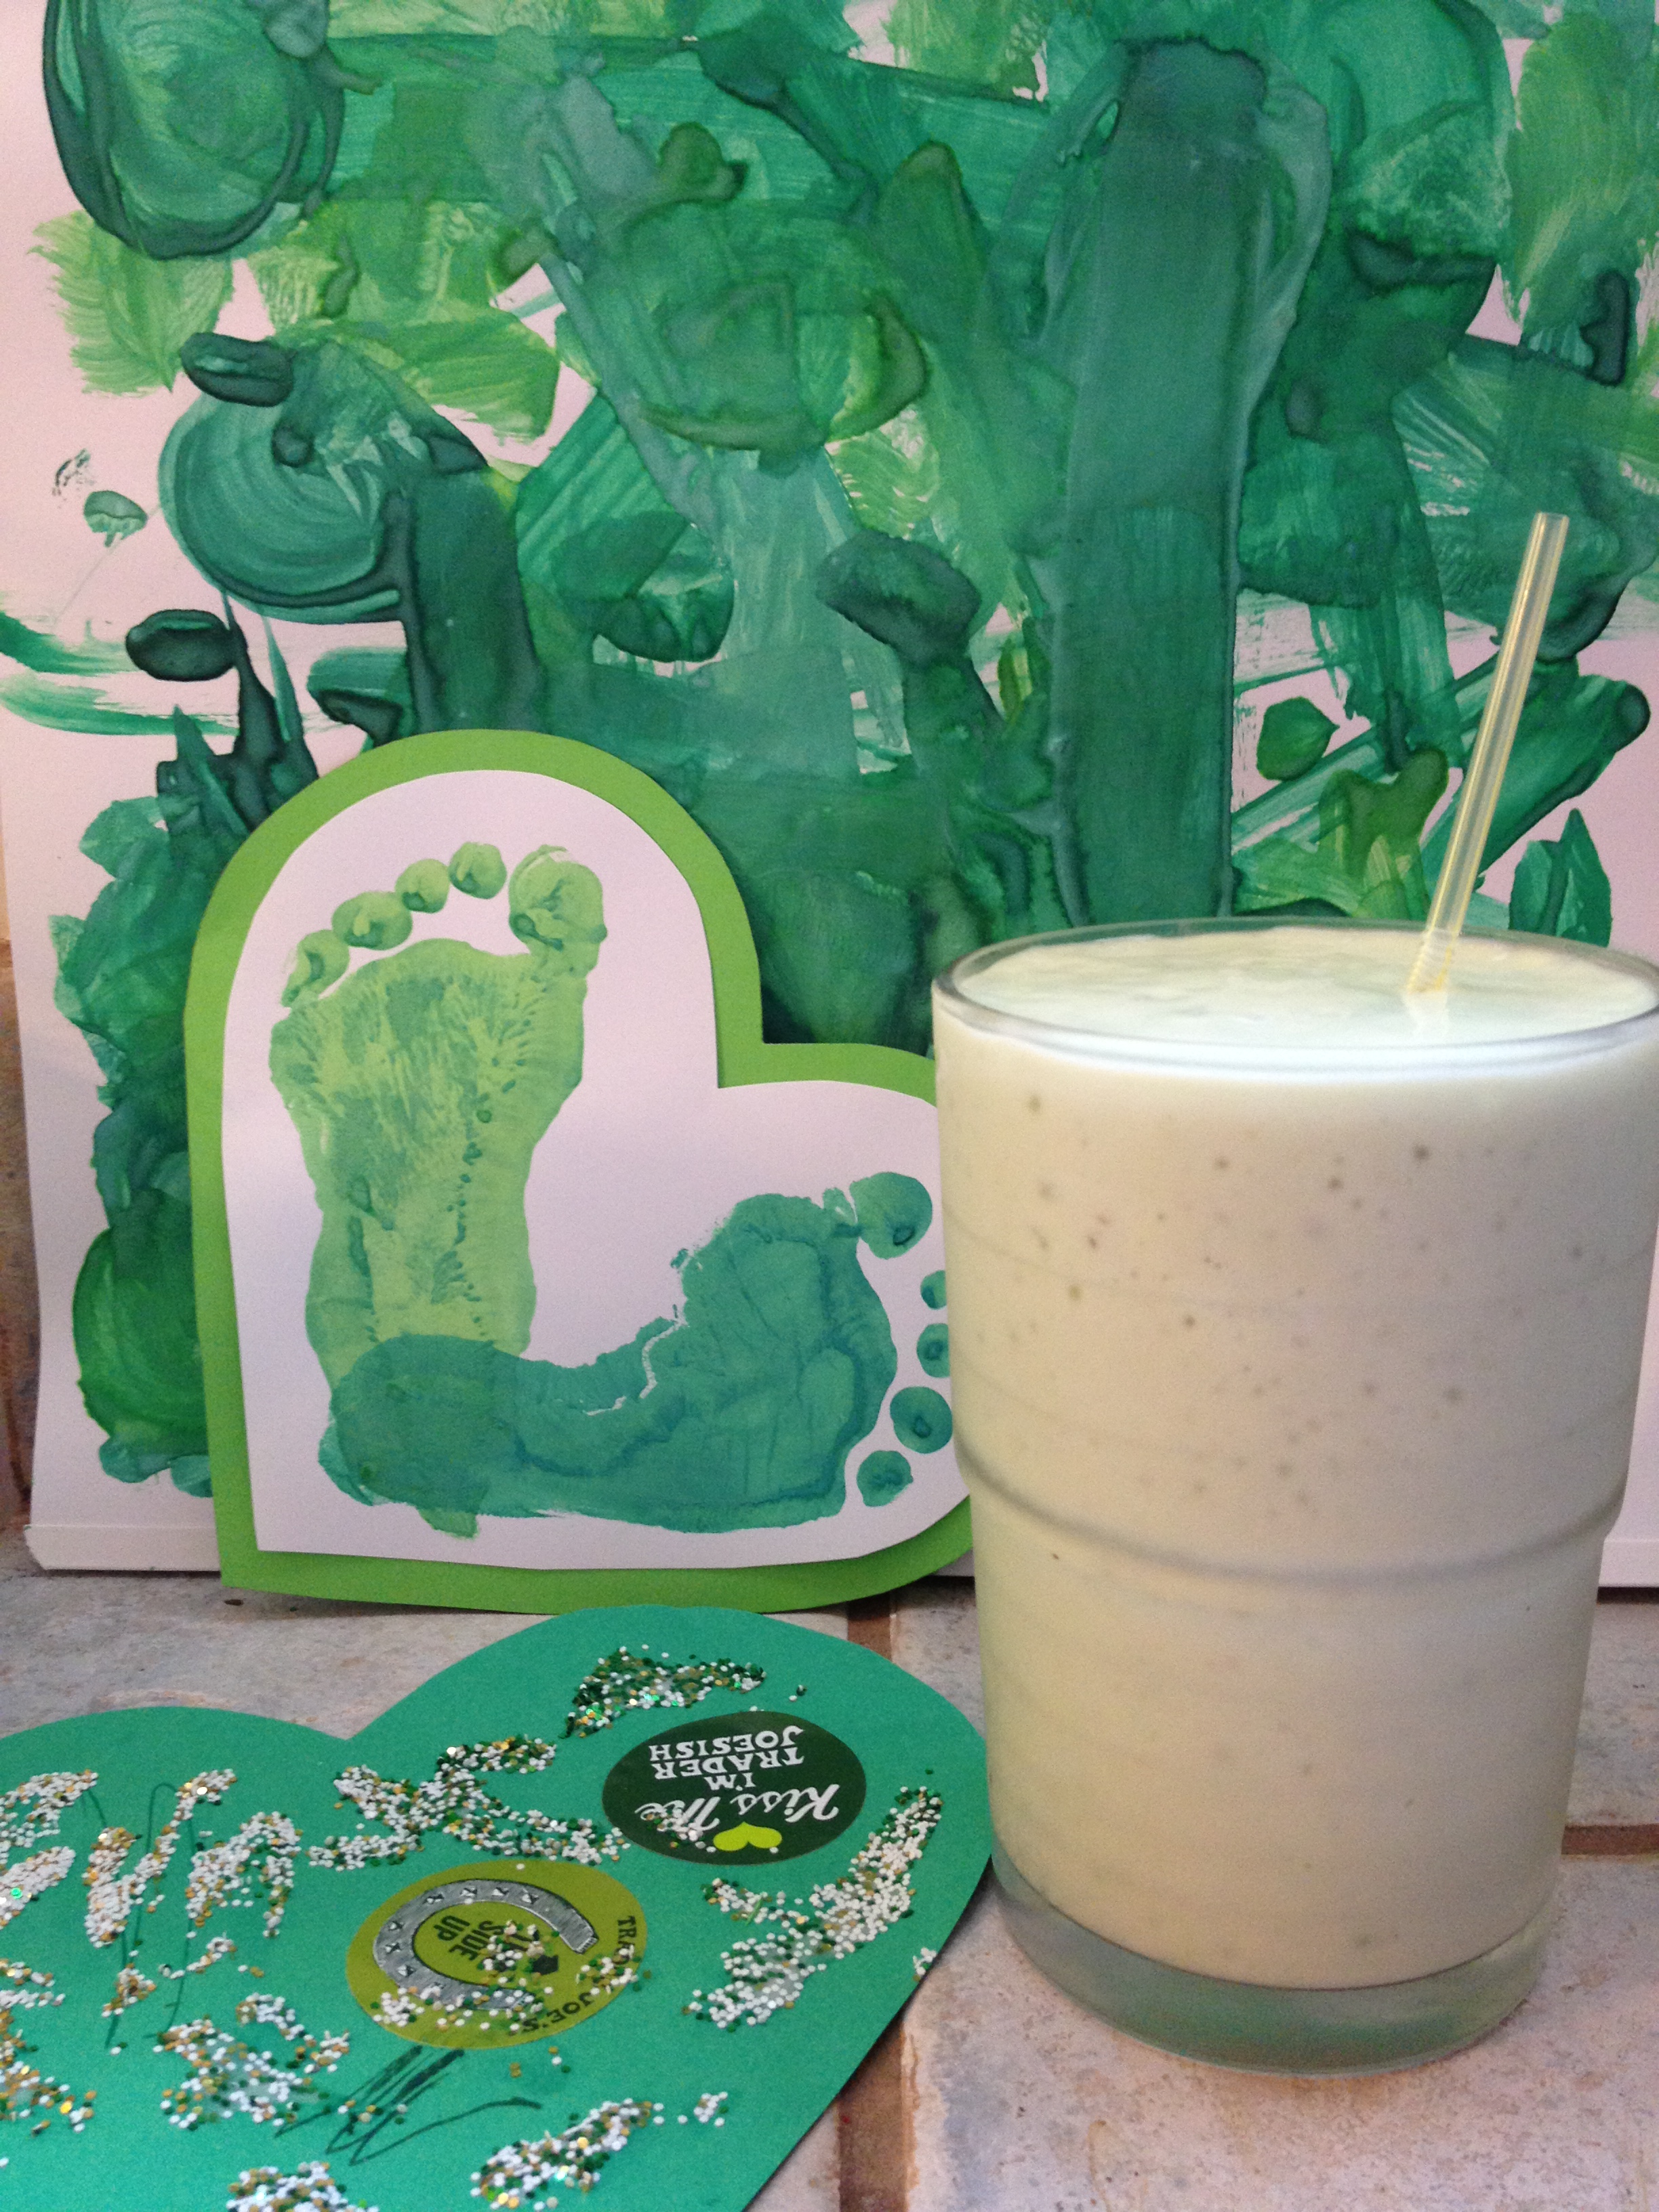
This recipe takes about 3 minutes and makes 2 1/2 servings (perfect for two parents and a tot!).
What You Need:
Ingredients (listed below)
blender
a few cups & straws
Ingredients:
1 medium sized ripe organic avocado
1 large ripe organic banana
1 1/2 C raw milk (or any desired milk)
3 heaping teaspoons of raw honey
1 tsp pure peppermint extract
1 C ice
1 handful of spinach or dark leafy green (optional for coloring)
Directions:
1. Place ingredients in a blender (ice on top) and blend until combined and smooth.
2. Pour into cups and enjoy with a straw. Top with homemade whipped cream and a real cherry if you’d like!
**Santa Monica Mama is a participant in the Amazon Services LLC Associates Program, an affiliate advertising program designed to provide a means for sites to earn advertising fees by advertising and linking to amazon.com.**
