K is for Cookie…O Wait, That’s Not Right! (Mini PB Chocolate Chip Cookie Recipe)

Standard

On our last “sick day” at home, K and I reread all of the library books we checked out the week before. One of her new finds was Laura Numeroff and Felicia Bond’s “The Best Mouse Cookie” where Mouse burns his first batch of cookies but makes a comeback by baking a mountain of chocolate chip cookies to enjoy.

TheBestMouseCookie

And just like “if you give a mouse of cookie,” if you give K any idea of a cookie, she wants to bake some herself! So that’s what we did.

One of my Mama friends in our co op shared this great gluten-free recipe for peanut butter cookies. Mmm! They were good. You should have seen the faces of our littles as they stuffed themselves silly 🙂

Since we don’t have white/refined sugar in the house (what the recipe called for), I thought I would do a little tweaking and come up with a version of my own. Oh! And I had to add some chocolate chips in it of course…what cookie at our house doesn’t have chocolate in it?

While I enjoyed both versions very much, my version of the cookies were a little more likely to crumble and melted in our mouths (probably because I substituted a tiny bit of honey for the cup of sugar the recipe called for)…and chocolatey!

Hope you enjoy the recipe as much as our family did!

Mini PB Chocolate Chip Cookies
Refined-sugar-, dairy-free, soy-free, grain-free, gluten-free

This recipe takes about 12 minutes (5 minutes prep time plus 5-7 minutes baking time) and makes about two dozen mini cookies

What You Need:
Ingredients (listed below)
medium sized bowl
whisk
measuring cup & teaspoon
cookie sheet lined with parchment paper or foil

Ingredients:
1 organic range-free large egg
1 C organic creamy peanut butter
3 heaping Tbsp organic honey
1/2 tsp salt (I use pink himalayan)
1/2 tsp baking soda
1/2 cup mini chocolate chips (I use Enjoy Life dairy-, soy- and gluten-free chips)

Directions:
1. Preheat oven to 350 degrees
2. Crack egg into bowl and whisk
3. Stir in peanut butter and honey
4. Add salt and baking soda and stir well
5. Mix in chocolate chips
6. On your lined cookie sheet, form balls (2 1/2cm in diameter) and push flat (about 1cm thick) leaving an inch of space in between
7. Put them in your oven for about 3 minutes and then rotate cookie sheet and leave in for another 3 minutes or until golden brown
8. Let them cool thoroughly (or they will crumble apart) and then enjoy!

*I made these a few times already and discovered the more honey you add, the less crumbly and more chewy they are 🙂

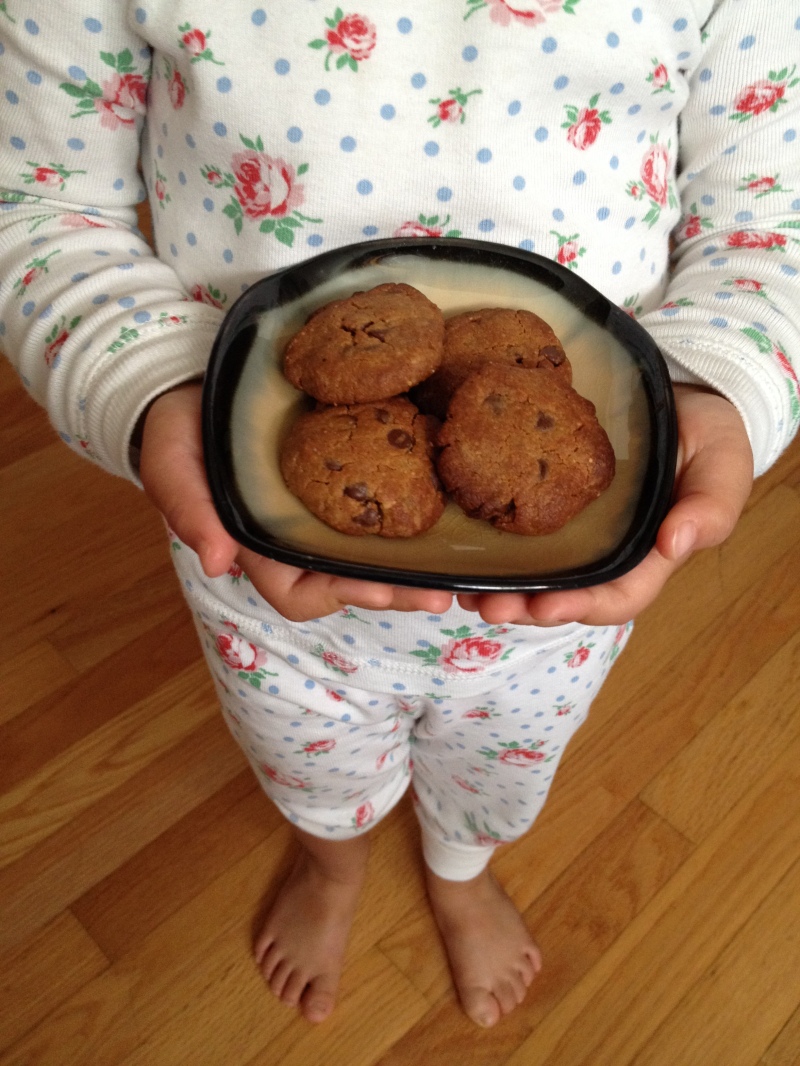
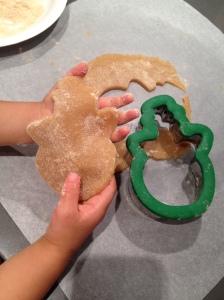
How K assembled the cookies:

photo 1 copy 2

Rolling the cookie dough into small balls

photo 2 copy 2

Placing one an inch away from another

photo 3 copy 2

 Pressing the ball down until about 1cm thick

photo 4 copy 2

All ready for the oven!

photo 4

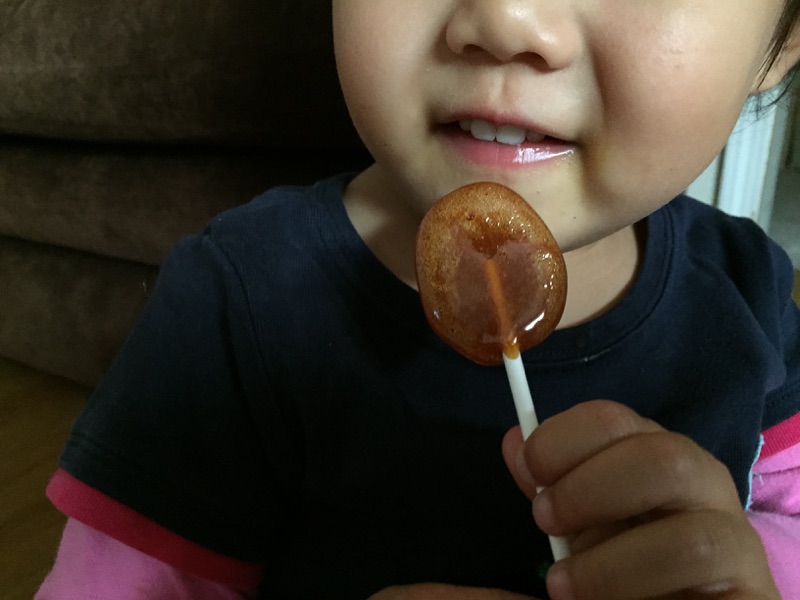
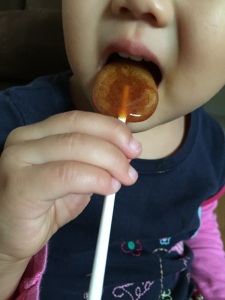
After waiting patiently for cookies to cool…K takes her first bite!

photo 3

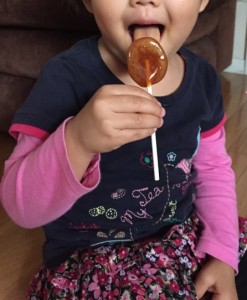
K licking off the crumbs that were left on her chin. Yum!!!

Fighting A Cold Naturally (plus K’s Honey Lollipops recipe)

Standard

Ugh! Being sick is no fun at all…especially when your little one is sick with you! It’s one thing to fight a cold on your own but watching your little one suffer can be unbearable at times.

I can count the fingers on one hand how many times K has gotten sick in the two and a half years of her life, and this past week was the first time she’s had to fight it on her own. I used to be able to nurse her through those rough days and nights and help boost her immunity. But those nursing days came to an end earlier this year. So…what was I to do?

I went through my “how to fight a cold” checklist in my head: homemade bone broth, lemon, raw honey, garlic, turmeric, coconut oil, probiotics and lots and lots of sleep! Check, check, check, check, check, check, check and…well, we’ll see how the sleep goes! I felt prepared to help both K and I win this battle!

So with my crockpot filled with some ACV, water and pasture-raised knuckle beef bones on high for the first few days, K and I managed to hang in there during the day between her coughs, sneezes, sniffles and her shouting “boogs” (short for, “tissue Mama!”) every few minutes. We constantly drank hot lemon tea, bone broth infused with garlic, turmeric, coconut oil and lemon juice and ate Bubbies’ sauerkraut (her favorite). Thankfully she was chipper all day long, filling our time with imaginary play, painting and playing basketball by making slam dunks in our laundry basket.

As for nights, the first few were a huge struggle. Tossing and turning, being waken by her congested coughs and stuffed nose, and running a high temp of 103, all poor little K could do was cry and try soothe herself back to sleep. The nights were miserable for all of us. I rubbed some garlic oil onto her feet and covered them with socks and turned up the humidifier on high, hoping to help draw the toxins out of her body while opening up her lungs. And as she slept for increments of 20-30 minutes at a time, I would lie there and pray, asking God for healing and for her fever to break.

With two almost sleepless nights, I felt like I was losing this battle. My health wasn’t getting any better (mainly due to the lack of sleep) and K’s didn’t seem to be progressing either. But thankfully, things turned around on the morning of day 3.

K woke up with a temp of 98.7 and while she looked a lot better, her raspy voice and congested cough said it all. She had a sore throat and was miserable. At that point, I took out my jar of organic raw honey and after giving K half a teaspoon that morning, I quickly realized that it did make her throat feel better…almost instantly! But…and here’s the BUT…it also made her HYPER!!! She rarely has any sort of sugar to begin with, but a full on gulp of it made her CRAZY!!! She ran around and her slam dunks in the laundry basket became SUPER slam dunks with loud shouts and squeals that I’m sure my neighbors loved to hear at 7am. “Honey, honey, more honey Mama!” was all I heard for the next hour or two.

At that point, I had to think of a more practical way to help soothe K’s throat opposed to feeding what was turning into a honey monster with spoonfuls of more honey by the hour. Ah ha! What about a honey lollipop? I googled “homemade honey lollipops” and came across a ton of great recipes. At this point, all I wanted was a quick and easy recipe I could whip up in 5 minutes. So I simplified all the recipes out there, gave this one a try and LOVED it!

photo 3

K’s Honey Lollipops
Paleo, refined-sugar-, dairy-free, nut-free, soy-free, grain-free, gluten-free

This recipe takes about 15 minutes (5 minutes cooking plus 10 minutes cooling time) and makes about a dozen pops

What You Need:
Ingredients (listed below)
small pot
metal spoon
parchment paper or silpat
lollipop sticks
candy thermometer

Ingredients:
1/2 C honey

Directions:
1. Place honey into the pot and put it on a medium-low flame
2. Stir and wait until your thermometer reads 300 degrees F and remove from heat
3. Allow to cool until honey is somewhat gloppy and formable when poured
4. Using your metal spoon, pour small 1″ diameter round dollops onto paper/silpat and place lollipop stick on top, rolling it to make sure the top is covered in honey
5. Wait until pops are cooled before removing and then begin licking! Wrap extra pops in parchment paper, seal them in a plastic bag and store in the fridge for later enjoyment!

After a few more days of more bone broth, lemon tea, ACV water, honey lollipops and R&R for the two of us, I am proud to say that K and I finally beat the cold!!! Today was our first full day out and about and both K and I were able to enjoy every minute of it ~ tissue free!

So…what to make of all this? Well, I’m thankful I haven’t yet had to give any meds to K with all the natural home remedies available and God’s healing hand. But when that day comes, at least I can say we fought the battle with all we had…and at least enjoyed K’s honey lollipops through it all 🙂

photo 2

Birth Days

Standard

A lot has been going since K’s second birthday…our lives have been filled with starting a toddler group co op which I’ve been running since September, the exciting holidays spent with family and friends, welcoming K’s first baby cousin into the world, and now nesting for our second little one this July!

If I can sum up the last six months or so in a few words, I’d say…”Birth Days.”

IMG_6954

Toddler Group – Since last year at this time, a few mom friends of mine and I started talking about preschools. While it’s more than a fortune to send a little one to school or daycare out here in Santa Monica, our hope was to give our littles a preschool experience but with parent involvement and without the high cost. I did some research about how I could start a preschool once K turned two and just knew with the little time we had, it would be nearly impossible to find a space, get licensed, enroll and then open. But then I came across the idea of starting a cooperative (co-op) and learned that parents could get involved and share their time, resources and any costs into running the school.  I fell in love with the idea and after sharing this vision with others, a group of 8 moms who have littles around K’s age decided to join in and we birthed the toddler group co op the week after K turned two. It’s been the biggest blessing for our family. We’ve been able to watch K grow in so many ways along with her close group of friends, I’ve learned so much from the other moms and have been able to rely on their support, and I’ve had the opportunity to do what I love most (or second best to being a mom & wife)…teach and work with little ones!

Holidays – From Thanksgiving and Christmas to Valentine’s and St. Patrick’s Day, our holidays were full of fun and laughter, yet were a little bittersweet knowing that it would be our last holidays with K as our only child. We enjoyed some of our family traditions and birthed some new ones too!

IMG_0636

Making Thanksgiving Turkey Hats

IMG_0007_2

Making Almond Flour Christmas Cookies

IMG_0027_2

 Gingerbread House Decorating

IMG_2237

Enjoying a New Year’s Shabu Shabu Lunch With Family

IMG_4632

Making & Breaking a Valentine’s Day Piñata With Friends

photo (4)

Making & Drinking Shamrock Shakes (tomorrow for St. Patty’s)

Baby Cousin’s Birthday – About a month ago, K’s first baby cousin was born into the world. “Donald Duck is born,” she told us (K referred to him as Donald for the past 6 months…and yes, that was around the time of her first Disney trip where she met the real Donald Duck). K anticipated Baby coming out for months and FINALLY he arrived. She was in awe of her cousin and could not help but giggle with joy every time she touched his head or his teeny tiny hands. And ever since then, she has told us that she has a special Baby Daisy Duck in her belly that will come out one day.

Anticipating One More Birth – Last September we found out we were expecting our second baby and Scott and I were beyond thrilled! Well, October and November rolled around and unlike my first pregnancy with K, I experienced what most moms go through…morning sickness. Ugh! I guess I had it really good the first time around because this morning sickness thing was no joke. From the moment I woke til the second I fell asleep at night, all I felt was nausea and everything I ate made me sick. Moving made me dizzy and the heat didn’t do me any good either. Thankfully it only lasted a few months and gratefully that was the worst of it. K definitely kept me positive and helped me get through it as she sang songs to Baby everyday, rubbed my rapidly growing belly and talked to Baby.

Last month we found out baby’s gender and K had the chance to watch Baby move during the ultrasound as she sang the “ABC’s” with her lips up to my belly. Excited to find out if she were going to have a sister or brother, she waited patiently, watching the screen. “You’re having a boy!” the doctor told us. K smiled and told us, “I’m having a brother!” The joy on her face emulated the room and all Scott and I could do was take it all in.

We couldn’t wait to share with our family so I decided I would whip something up in the kitchen to share the news. I tried a new recipe (Chocolate Pots De Creme by LA Fuji Mama) and they were a hit! I hid blueberries under the fresh whipped cream and then had the family top theirs with either a raspberry or blueberry with their guess. And to their surprise (apparently K tricked them and said she was having a sister a few hours before), they found blueberries in their dessert confirming she would be having a brother!

IMG_4072

I’m excited to be back blogging again…well, at least for the next few months until Baby Boy arrives. Hope to share some of our favorite co op art projects and activities, what’s been going on in our kitchen, all the new seedlings we’ve planted in the garden and some of our new go-to places here in Santa Monica!

My New Favorite Bento Box (plus an exciting e-book collaboration)

Standard

Grrrr…I used to get so frustrated when K opened up her bento box and her meal was all mixed up! It definitely wasn’t my intent to have all the compartments full of green beans and cashew chicken topped with hummus, zucchini and apple slices! And K would know because she would take her time picking out each piece and placing into its separate compartment. After a good five minutes of practicing her sorting and fine-motor skills and then licking off the hummus on her fingers, lunch would finally begin!

Several months ago I discovered a bento box that can actually keep all the food (including sauces) in its place! And not only is this bento box made especially for kids (meaning durable/drop-proof, kid portion-sized, easy to use), it’s adorable, BPA-free, has a 2-year warranty and comes in a variety of colors. This bento box is called…BENTGO KIDS!!!

Bentgo Purple (3)Bentgo Purple (5)

And here’s the background to how I discovered this new awesome masterpiece (so new, it actually doesn’t even come out til tomorrow)…earlier in the year, my friend asked me if I might be interested in sharing a healthy recipe and filling a standard 2-tiered Bentgo box with a healthy meal for an e-book. I said “yes” of course and submitted my coconut flour raspberry muffins recipe served with chicken, baked sweet potato fries and some fruit. All was great, especially after receiving a standard Bentgo lunchbox of my own! Several months later, I heard back and asked if I would submit a few kid-friendly recipes and see if I could be part of an e-book collaboration for a new product on the market. Having faith that my eczema inflamed hand would even allow for me to even whisk an egg in a bowl, I said “sure” and got working in the kitchen. Inspired by my newest knowledge about eating right and keeping my eczema under control (gluten-free, grain-free, soy-free, refined sugar-free), I created ten recipes that were approved for publishing of their Bentgo Kids e-book (free with purchase of a Bentgo Kids lunchbox). In mid-August, not only was my hand miraculously cured, I was ready for a photo-shoot for the book. And that was an AWESOME experience ~ I felt like was on Master Chef for 90 minutes, chopping, creating and carefully placing the carefully planned meals into each compartment of the Bentgo Kids lunchbox. And last week was just as AWESOME when I received my very own (well, K’s very own) Bentgo Kids lunchbox in the mail!!!

 Bentgo Green (5)

After using it three times thus far I’ve been so impressed! The food stays in its place, it keeps K’s lunch insulated and they’re enough compartments for a lot of variety. I especially love the rubber gripping on it that keeps the box from sliding off the table (that’s happened one too many times with her other bento boxes, leaving K in tears). And hearing the comments I’ve been getting from other moms made me realize how practical this lunchbox is.

Okay, so I’m sure it sounds like I’m being paid to advertise this lunchbox, but I assure you, the Bentgo company didn’t have me sign a commitment to writing a post, promoting its product, etc…this is written based on the joy my Bentgo Kids lunchbox has brought K and me 🙂 And I’m loving it so much, I encourage you to take a look at it for yourself before getting one for your toddler, a friend or even yourself (yes, I am contemplating getting a blue or green one for me!). You can watch a short video promo here (you get a few seconds glimpse of a few of my meals) and here is a detailed sheet I requested for this post:

   BentgoKids_lit_sheet

With a purchase, you get a FREE e-book of 30 healthy, fun kids recipes (I can’t wait to see how the cookbook turned out!). The retail price is $27.99 and pre-sales open up online tomorrow, November 13 at www.bentgo.com ~ it’s never too early to get some holiday shopping done!

Zoodles of Fun With Octopus Friends

Standard

I was at the Virginia Park Farmers Market with my family last weekend and was thrilled to see all the fall vegetables starting to come in! As I scanned the rainbow of organic produce on the tables, I couldn’t help but stop at the beautiful zucchini and yellow squash, just picked the day before. Chocolate Chip Zucchini Muffins…Squash Fritters…Zucchini Pancakes…my mouth began to water. The dark green and deep yellow skinned squash were calling my name! So I walked over, asked for a few samples and all I could hear was crunch, crunch, crunch followed by, “Mmmm, Mama. Soooo dee-lish-ish!!! May I have more please Mama?” So I picked up a handful of zucchini and yellow squash, already excited to make something yummy for K and the family!

IMG_3757

Over the past few months, I’ve been working on a recipe e-book collaboration with a company and they asked me to create 10 toddler/kid-friendly dishes, one of which I will share today: Zoodles of Fun With Octopus Friends – Octopus Hot Dogs & Zoodles (Zucchini Noodles) With Peas. I hope you and your little one enjoys this gluten- and grain-free pasta!

Here’s what I did:

IMG_3737

Took two hotdogs and carefully sliced them into little octopi..

IMG_3742

I carved cute faces on them with my knife and a toothpick and then adored them for a few minutes…

 IMG_3747

Until K found a few, got hold of ’em and the fun began! She had a few minutes of play while I heated them up on the pan…

IMG_3759

K turned the vegetable spiraler and laughed as the Zoodles came out of it…

IMG_3757

After sautéing the Zoodles with some butter, I threw in some frozen peas and then topped the dish with the friendly octopi 🙂

While I loved eating this tasty noodle dish (one of the few I get to enjoy with my eczema/allergies), I savored the HUGE smile on K’s face as she giggled and then smiled back at the octopi on her plate!

Octopus Hot Dogs & Zoodles (Zucchini Noodles) With Peas
Paleo, refined-sugar-, dairy-free, nut-free, soy-free, grain-free, gluten-free

This recipe takes about 15 minutes and makes 1 adult-sized serving, 1-2 kid-sized servings or 2-3 toddler servings (all depending on their appetite).

What You Need:
Ingredients (listed below)
Cutting board & knife
Vegetable spiraler  or Julienne Peeler
Small bowl
Small sauce pan & spoon
Toothpick
Serving dish/bowl

Ingredients:
1 hotdog link (I use Applegate’s organic nitrate-free 100% beef dogs)
3-4 Tbsp filtered water
1 medium-sized zucchini squash
1 Tbsp grass-fed butter or coconut oil
1/4 C frozen peas

Directions (Hot Dogs):
1. Using your knife, slice the hotdog link in half so that you have two half sized links.
2. Leaving 3/4″ at the end of each link (where the casing ends are), slice the rest of the link in half, making two long tentacles.
3. Slice the two tentacles in half again making four tentacles on each octopus.
4. Slice each tentacle in half so that each octopus has 8 long tentacles (if your little one doesn’t eat a full-sized hot dog, you can save the other octopus for later or make smaller sized ones like I did).
5. Pour 3-4 tablespoons of filtered water into your sauce pan so that it covers the bottom and put it over a medium-low flame. Once the water starts to bubble, place your octopus hotdogs in and rotate until they are tender.
6. Once ready, remove and let cool. Using your toothpick, poke holes to make little eyes and using your knife, carefully carve out smiles!

Directions (Zoodles WIth Peas):
1. Rinse and dry your zucchini, cut off its ends and use your “pasta” tool to create Zoodles (if you’re using the vegetable spiral, get your little one involved by turning the handle and placing the Zoodles into your small bowl).
2. Cut Zoodles into an appropriate length for your child (1 1/2″ is just right for K).
3. Rinse your saucepan clean, put your butter or oil in the pan and place over a medium-low flame.
4. Saute your Zoodles until they are al dente and then remove and let cool.
5. Put peas in the sauce pan, stir them around until tender and then remove from heat.
6. Once cool, lay the Zoodles onto a dish, sprinkle some peas on top and joyfully pop in your happy octopi for your little one (or yourself) to enjoy!

**Santa Monica Mama is a participant in the Amazon Services LLC Associates Program, an affiliate advertising program designed to provide a means for sites to earn advertising fees by advertising and linking to amazon.com.

Chocolate Pudding (Paleo, refined-sugar-/dairy-/nut-/soy-/grain-/gluten-free)

Standard

It’s extremely HOT out here in Santa Monica! We’ve been trying to beat the heat with icy cold treats like Coconut Sprinkled Chocolate Covered Bananas, Homemade Shamrock Shakes, and Coconut Pear Avocado Popsicles. One of K’s favorites that we enjoy making together is our Paleo, refined-sugar-/dairy-/nut-/grain-/gluten-free Chocolate Pudding! I remember someone telling me that you could make your own pudding so that it fits your needs (no refined sugar, additives, preservatives, etc.) so I thought I’d give it a shot. After doing some research on Paleo puddings and several tries with a few ingredients and my Vitamix, I think I figured out a perfect recipe (at least for us)! I LOVE how this recipe only needs a few ingredients and could be prepared within minutes. I like to make a large batch, divide it up in glass containers and place them in the fridge/freezer to serve later in the week. K especially likes it when I place it in the freezer for about 15 minutes before serving on a hot, hot day like today!

I have MANY versions of this pudding using a variety of spices and fruits but two of my favorites are coconut milk based and strawberry based…

Here’s what I did (coconut milk version):

IMG_9992

Gathered the ingredients and pureed them in my Vitamix for about 15 seconds…

IMG_1214

Had K slice and then chop some strawberries to use as a topping…

IMG_9923 

Served about a half cup to K and she LOVED it, licking the bowl clean!

IMG_2951

I stored the rest in glass containers and placed them in the freezer for later.

IMG_9996

I also saved the pit, placed it in a water-filled mason jar with toothpicks and watched it grow in the windowsill (this is the one we just planted ours in a pot after 5 months and it’s now thriving outside in the sun)!

I hope you have a fun time experimenting with different versions of this chocolate pudding…please include your version in the comments below. We’d love to try a new one!

Chocolate Pudding (coconut milk-based)
Paleo, refined-sugar-, dairy-free, nut-free, soy-free, grain-free, gluten-free

This recipe takes about 3 minutes and makes 2 servings (or 3 for a toddler)

What You Need:
Ingredients (listed below)
blender with spatula
serving bowl & spoon
knife & cutting board (optional for fruit toppings)
glass (freezer) containers (optional for storage)

Ingredients:
1 peeled organic banana (the greener the healthier)
1 pitted organic ripe avocado
2 Tbsp unsweetened cocoa powder
1/4 C coconut milk
fruit or coconut flakes for a topping

Directions:
1. Place all ingredients (except toppings) into the blender and puree.
2. Use spatula to remove putting and place into bowl/storage containers.
3. Slice/chop fruit and then sprinkle over pudding.
4. Enjoy immediately or place into the freezer for about 15 minutes for a frozen treat!

Chocolate Pudding (strawberry-based)
Paleo, refined-sugar-, dairy-free, nut-free, soy-free, grain-free, gluten-free

This recipe takes about 3 minutes and makes 2 servings (or 3 for a toddler)

What You Need:
Ingredients (listed below)
blender with spatula
serving bowl & spoon
knife & cutting board (optional for fruit toppings)
glass (freezer) containers (optional for storage)

Ingredients:
1 peeled organic banana (the greener the healthier)
1 pitted organic ripe avocado
2 Tbsp unsweetened cocoa powder
1/2 C organic strawberries (I use frozen ones)
fruit or coconut flakes for a topping

Directions:
1. Place all ingredients (except toppings) into the blender and puree.
2. Use spatula to remove putting and place into bowl/storage containers.
3. Slice/chop fruit and then sprinkle over pudding.
4. Enjoy immediately or place into the freezer for about 15 minutes for a frozen treat!

Sending Our Aloha From the Craft Room: DIY Lei Making

Standard

Today, Baby K and I celebrated Lei Day by picking out some flowers and stringing K’s first lei. Leis are a symbol of aloha, love, and they are significant to me personally because they remind me of my visits to Hawai’i staying at my grandparent’s place in Waikiki. Both K and I also have the middle name Leilani, meaning heavenly flower. In case you’ve not heard about Lei Day, it is an official holiday in Hawai’i where everyone gets together and celebrates the culture by participating in food, music, dance, lei making and other festivities that are held at Kapi’olani Park on Oahu and at other locations on the major islands.

photo 3

I thought I’d share how we made K’s first lei in case you’d like to try making your own:

1. We picked out a bunch of flowers from the local market (she really liked the white Mums). Mums worked out great because they were full of petals and didn’t fall apart when strung.

 photo 1

2. We gathered all the materials needed: white cotton thread, optional silk ribbon to tie on each side (if you’d rather tie on the lei) a quilting/lei-making needle, a sturdy pair of scissors and the bouquet of flowers.

photo 2 photo 3

3. K took the bunch of flowers apart and then we snipped them off, leaving about a cm left of stem.

  photo 5 photo 1 copyphoto 2 copy

4. We strung each flower from the stem up (I helped poke the needle through and K pulled down each flower to the bottom of the lei.

 photo 3 copy

  photo 4 copy  photo 1

5. I helped push the flowers closer together so that the stems pushed into the flower petals and then tied the two ends together. K tried the lei on and then gave it to me to wear, even giving me a hug as we would do in Hawai’i when giving a lei as a gift of love and aloha!

photo 3

  photo 5  photo 4

Seedlings & Eggshells

Standard

IMG_1873
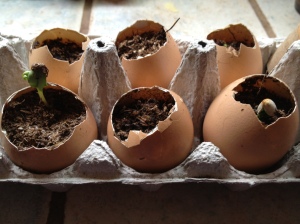
We go through two to three dozen eggs a week making breakfast scrambles, omelets, pancakes, and occasional baked goods like muffins, cakes and cookies. Once in a while, I’m able to crack the egg just right so that only the top has an opening. Inspired by those “grow your garden kits” that I’ve seen, I’ve always wanted to start my own eggshell seed starter project! Now that it’s spring and I’ve collected about a dozen nicely cracked shells, I thought K and I could spend some gardening time in the craft room!

About a month ago, Mama Christine invited a few families over for a gardening day at her place. It was a beautiful warm, sunny day filled with food, water play and some messy gardening fun! Baby K enjoyed her first gardening experience learning how to place rocks in the bottom of the pots to allow the water to drain…

IMG_1083  IMG_1067

filling a pot with soil, covering the roots with soil once the seedling was in and watering it…

IMG_1090  IMG_1065IMG_1095  IMG_1116

She also helped replant some lavender and couldn’t get enough of the flowers’ and leaves’ sweet scent.

IMG_1106

From the way she now checks on her bean plant and waters it every day, I can say that she has a teeny tiny green thumb! This experience (and watching an avocado seed root and become a little 1′ tree in our window sill over the past few months) was a perfect way to “front load” this eggshell project!

Seedling & Eggshell Project in a Nutshell Eggshell

Materials: cracked open & washed eggshells, organic soil, spoon, water, eye dropper, germinated organic seeds (organic seeds placed in a wet paper towel then put into a plastic bag, left for a few weeks until roots begin to grow), windowsill

After letting K explore all of the project materials (and watching K experience how much power her little hand has when squeezing and then cracking an eggshell), she began by filling the shells with organic soil (3/4 full) and then picking out the seedlings that have rooted…

 IMG_1537IMG_1533image

K placed a seed in the middle of each eggshell and then covered it with more soil…

 image_1 image_2

She squeezed a few eye droppers full of water into each eggshell and then placed them into the carton…

IMG_1572 image_3 image_5

I placed them by the windowsill in our kitchen and K watered (a few drops daily to keep the soil moist), watched and waited (VERY patiently) every day…

image_4

7 days later…

IMG_1868

And tonight!

IMG_1940

(Pink Lady Apple, Meyer Lemon, Kumquat)

K has been LOVING this project and even had the chance to share a few of her seedlings with her friends so that they could enjoy caring for a seedling and watching it grow! Over the next few weeks, we will be germinating an array of seeds to help a friend add to her beautiful vegetable, fruit and herb garden. Our seeds include organic Mesclun lettuce, Radicchio, Bush Bean, Bitter Melon and a variety of Japanese vegetables including Shishito Red Peppers, Mizuna, Shiso and Japanese Cucumber. We are very excited to get started and watch this garden grow!!!

What will you be planting in your eggshells? 

Baby K Screams for Ice Cream (plus a $25 gift card giveaway to 3 readers from Beachy Cream)

Standard

Baby K just LOVES ice cream! She literally screams, squeals and signs for “more” when I mention the word. She’s enjoyed eating organic, homemade ice cream (well, not exactly ice cream, but whipped up frozen puree) since she was about 5 months old. Since K started solids, she’s always preferred her food cold…and I mean slushy, freezing cold (maybe because she had some pre-teething going on, preferred her food cold or just could not wait for me to heat up her meal). Fortunately because of her ice cold food preference, K made it real easy for me when it came to preparing her meals. Instead of having to warm her pre-frozen ice cube purees in a water bath or on the stove, all I had to do was stick a few cubes in the fridge a couple hours before and then mash it into a ready-to-serve “ice cream” treat.

It wasn’t until she was around 9 months old when I started making her actual fruit-based ice cream and sorbets. Whether I blended frozen bananas, avocados, strawberries or mangoes with frozen cubes of my homemade organic coconut milk or organic full-fat cow’s milk yogurt, she couldn’t get enough of it (and my husband and I couldn’t either). It was a little after her 1 year old birthday when we decided we would have a sugar- and grain-free kitchen (meaning only a bit of honey, coconut crystals or maple syrup as sweeteners and we said our goodbyes to rice, oatmeal and any sort of grains), and that’s when my homemade ice cream recipes and my Vitamix came in handy for our entire family!

IMG_9345       1048009_10153118677320001_1769511870_o-250x333

But in the occasion that we go out for a cold, refreshing ice cream treat (like this Valentine’s Day), we visit Santa Monica’s best ice cream parlor, Beachy Cream! This ice cream and sweet shop prides itself using 100% organic locally sourced and sustainable ingredients (the only ice cream company that can make that claim in LA). Now that’s real high-quality ice cream…ice cream I would give baby K one day! As a partner of Community Perks, I had the chance to connect with Ann Ryan, Founder and President of Beach Cream, listen to her story and get the latest scoop on their creations.

unnamed-1

Beth Stockwell and Ann Ryan (co-owners for Beachy Cream)

Inspired by her passion for food especially from spending summers in Cape Cod as a little girl, her grandmother’s love for baking and fond childhood memories of ice cream, Ann decided to leave her successful career in the film and financial industry to turn her favorite pastime of making and experimenting with new ice cream flavors into a viable career…starting her own ice cream shop! In 2009, Ann purchased an ice cream cart, used her grandmother’s molasses spice cookie recipe, and started making ice cream sandwiches with local, sustainable ingredients. Soon she had access to a kitchen at a local café, gained her first commercial customer, and started Beachy Cream 100% organic ice cream.

 426719c2cefe11e2a4b822000aaa04bd_7-250x250 8ac676b897c811e180d51231380fcd7e_7-250x250

Beachy Cream has created what I (and anyone who’s tasted one) call
the perfect ice cream sandwich!!!

unnamed-3 

The ice cream and the pin-up girls that represent the brand are inspired by Cape Cod summers, family recipes, and coastal surfers. You can find the pin-up style models wearing vintage swimsuits and serving ice cream sandwiches to guests at events from local Santa Monica festivals to celebrity events including Elton John’s Oscar Party. They’ve also been featured on the Food Network’s “Unique Sweets.”

unnamed

Beachy Cream always brings smiles and joy to families in our city, including ours! I am always intrigued by their creative flavors like Ginger Wipeout, B*tchin Hot Chocolate (my all time favorite) and Key Lime Cowabunga (my husband’s fav). In addition to their ice cream based treats like sundaes, floats, shakes and malts, they serve delicious 100% grass-fed beef hotdogs and chili which can be served in a gluten-free or a pretzel bun. Check out their menu here!

And here’s the latest scoop…after talking to Ann, it looks like they are even contemplating the idea of creating a baby/toddler friendly ice cream with the use of organic fruit as its sweetener. Ice cream made especially for babies and tots to enjoy at an actual ice cream shop?? What a revolutionary idea!!! I can already imagine K screaming for Beachy Cream ice cream 🙂

If you haven’t had a taste of their organic ice cream yet, it’s time you head on over to Beachy Cream, located at 1209 Wilshire Blvd., Santa Monica 90403. And as an encouragement to my readers, we are doing a shared giveaway for a $25 gift card to Beachy Cream that 3 lucky ice cream lovers will win!

beachy_cream_logo

Enter this giveaway!!!

I’ll end with a quote (which I love) that Ann and Beth shared with me,

“We at Beachy Cream believe everyone deserves a sweet treat every once in a while. While enjoying Beachy Cream, people can feel good about what they’re putting in their bodies as we are 100% organic and don’t ever put any chemicals or stabilizers in our ice cream. We love making people happy, one sweet treat at a time!”

Which Beachy Cream ice cream flavors would you like to try?

**Santa Monica Mama is a participant in the Amazon Services LLC Associates Program, an affiliate advertising program designed to provide a means for sites to earn advertising fees by advertising and linking to amazon.com.